- Install & Customize: Install Windows 11 within your VM, then add all desired applications and remove bloatware. Remember to apply
AppDatachanges toC:\Users\Default\AppData\Roamingfor all user profiles. - Generalize with Sysprep: Use
Sysprep(sysprep.exe /oobe /generalize /shutdown) to prepare your installation for deployment. Be ready to troubleshoot BitLocker encryption or Windows Store Appx package errors. - Capture Your Image: Boot your VM with a WinPE environment (like Hiren's Boot CD) and use the DISM command to capture your customized image into an
install.wimfile. - Personalize Your ISO: Integrate your newly captured
install.wimfile into a fresh Windows 11 ISO, replacing the original. - Create a Bootable USB: Use a tool like Rufus to create a bootable USB drive from your custom ISO, ready for deployment.
Do you need to deploy a customized Windows 11 installation on a bunch of corporate laptops? Or maybe you’re interested in creating a custom Windows image with all your preferred software and configurations already set up for reuse on multiple devices?
This guide’s got you covered. We’ll go through the steps of capturing a customized Windows image, as well as the most common issues you’ll encounter.
1. Get Your Windows 11 Ready
To start, you’ll need a Windows 11 ISO.
- If you’re working with volume licensing, grab your Windows 11 Enterprise ISO from the Microsoft 365 Admin Center.
- If not, you can download the Windows 11 ISO from here.
2. Set Up Your Build Environment
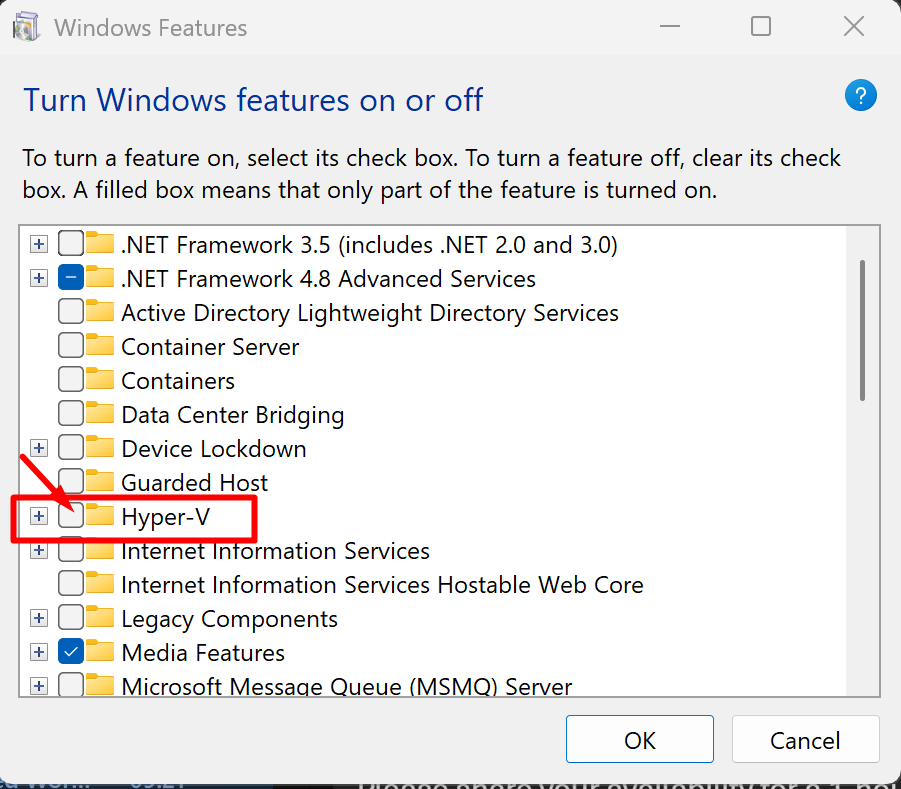
We’ll be building this image inside a virtual machine. So, enable the Hyper-V feature on your workstation.
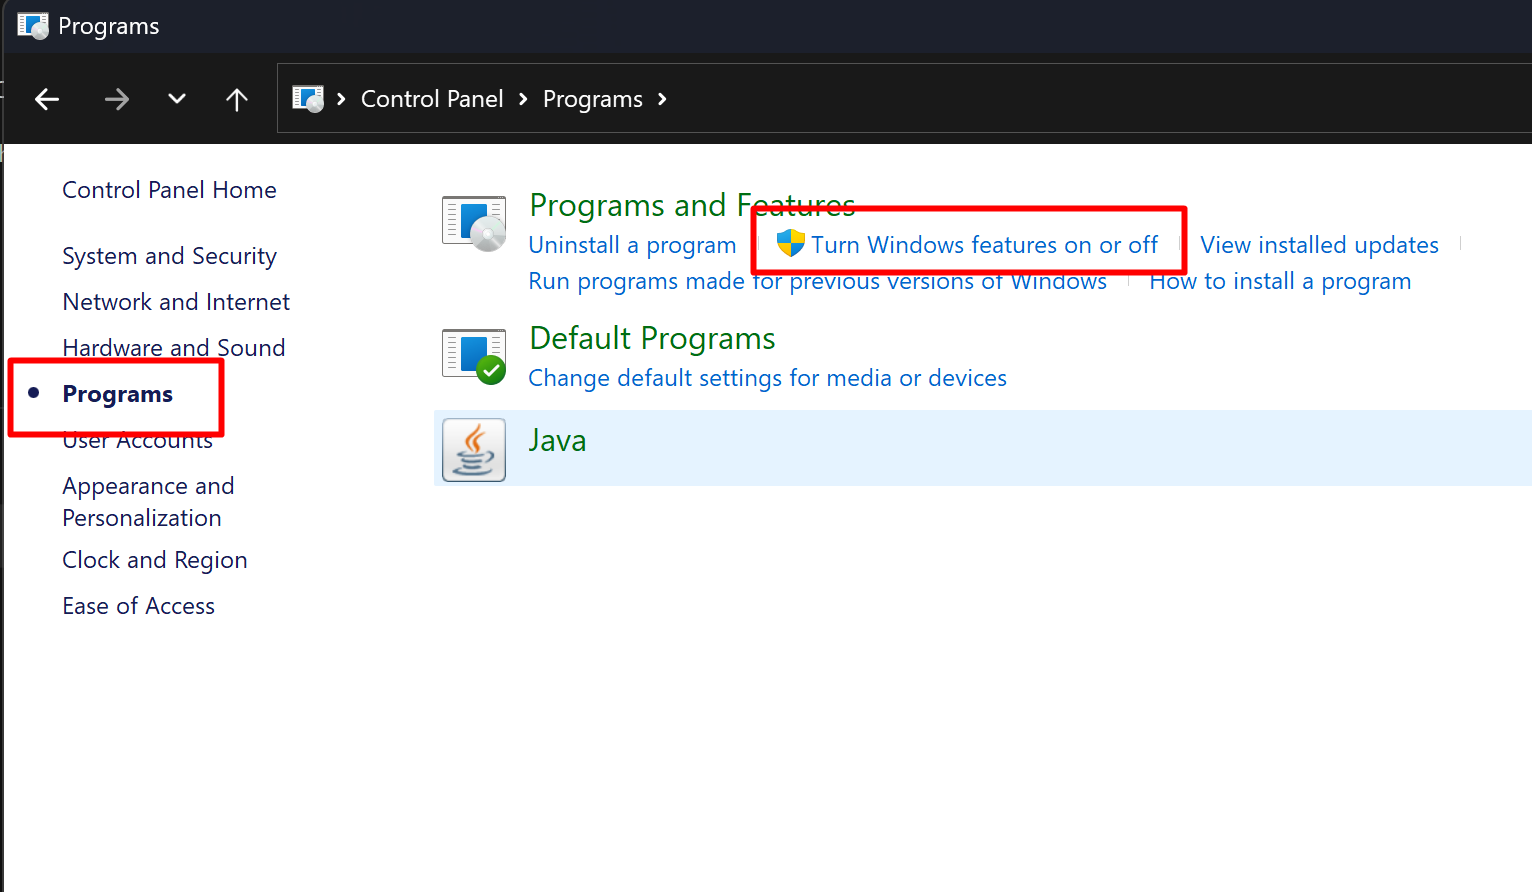
- Navigate to the control panel and select Programs > Turns Windows features on or off.
- Tick the Hyper-V feature and click on OK.
 |  |
You’ll need to restart your PC for the Hyper-V feature to be installed.
N.B. You also need to have virtualization enabled in your system BIOS to use Hyper-V, VMWare, VirtualBox, etc.
After restarting your workstation, create your new virtual machine in Hyper-V and make sure TPM is turned on… Windows 11 insists on it.
3. Install Windows and Your Essential Apps
Now, install Windows 11 as you normally would within your virtual machine. Then, add all the software you want pre-installed in your custom Windows Image.
N.B. If you want to make any AppData changes to all user profiles that will be using the customized Windows installation, apply the changes to C:\Users\Default\AppData\Roaming.
After getting all your core applications installed, take a moment to tidy up. Uninstall any bloatware you don’t need, like Xbox or Solitaire.
4. Generalize Your Windows Installation with Sysprep
Sysprep is the tool that prepares our Windows setup for capturing. It essentially makes the installation generic, so it can be deployed on different machines.
- Open Command Prompt as an Administrator.
- Change directory to Sysprep:
cd C:\Windows\System32\Sysprep - Run the Sysprep command:
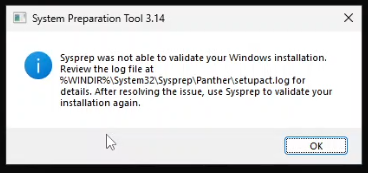
sysprep.exe /oobe /generalize /shutdown
You might hit a snag if your OS drive is encrypted… This is typical on Windows 11 installations. If Sysprep throws an error, check the log file; it will likely point to the encryption.
 | 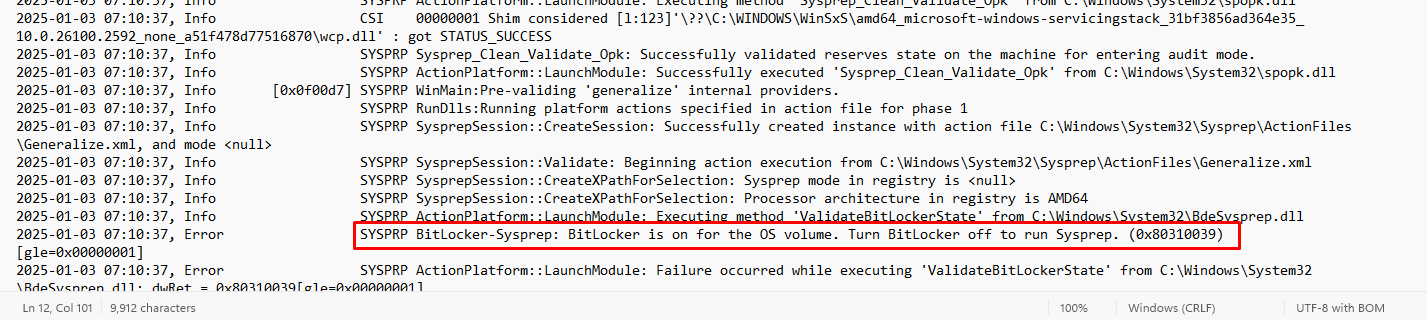 |
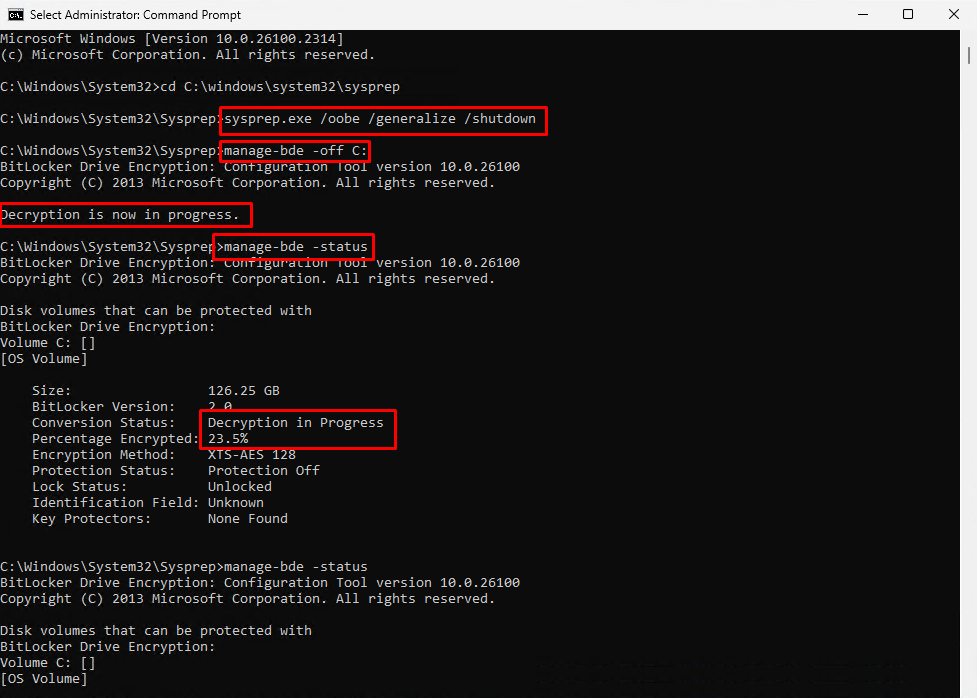
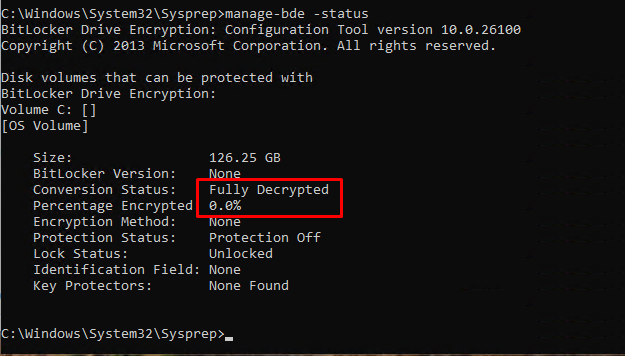
To fix this, turn off BitLocker by running this command in CMD: manage-bde -off C:
You’ll see a message that decryption is underway. You can keep an eye on its progress with: manage-bde -status
Once your OS drive is fully decrypted, give that Sysprep command another go.
Another common hiccup happens if one of the Windows Store apps is installed for one user but not set up for all users. The Sysprep log will clue you in on which app is causing the trouble.
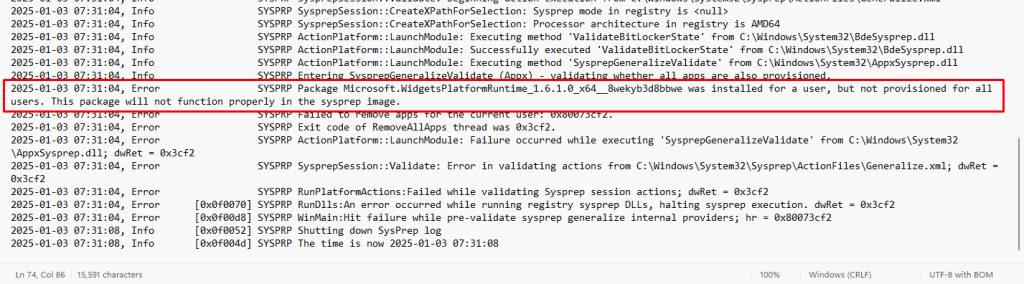
To remove it, open an elevated PowerShell session and type:
Remove-AppxPackage -Package <<packagenamegoeshere>>
You might need to repeat this for a couple of apps until Sysprep runs through without a hitch.
5. Capture Your Master Image
After Sysprep works its magic and shuts down the virtual machine, it’s time to capture our customized image.
- Attach an empty VHD to your virtual machine.
- Boot up your VM using Hiren’s Boot CD or a WinPE environment.
- In the boot environment, make sure your Windows installation is mounted as
C:\and your empty VHD asE:\. - Now, capture your image and save it to
E:\with this DISM command:
DISM /capture-image /imagefile:E:\install.wim /capturedir:C:\ /name:"Win11" /compress:fast
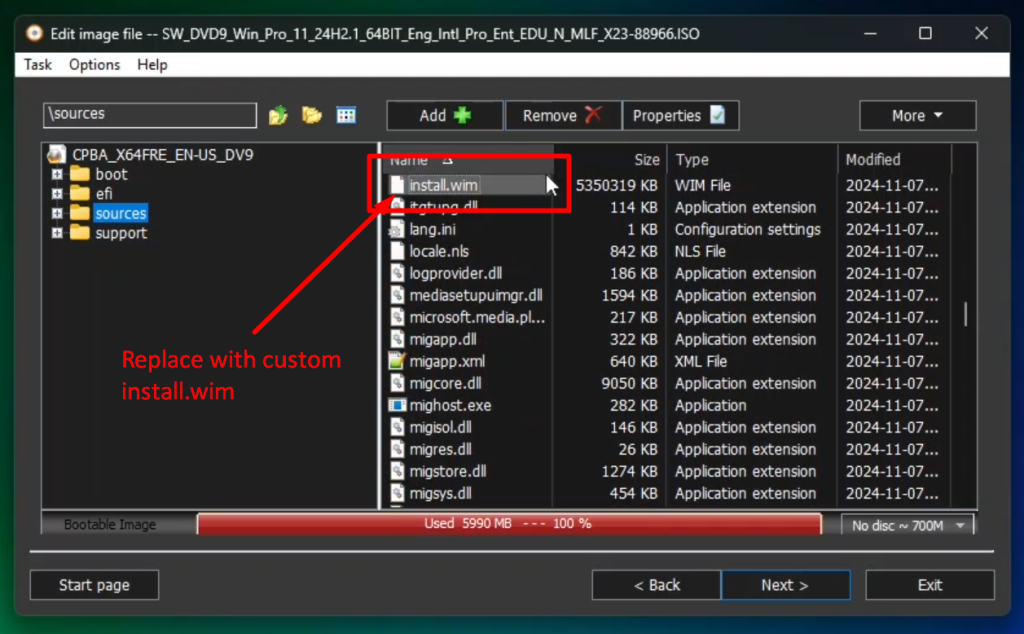
6. Personalize Your Windows 11 ISO
Now that you have your install.wim file, you’ll integrate it into a Windows 11 ISO. Using a tool like AnyBurn, open the ISO, navigate to the sources folder, remove the original install.wim, and drop in your newly captured install.wim file.
7. Create a Bootable USB
Last but not least, we need to make a bootable USB stick from our new custom ISO. Grab Rufus (or your preferred tool). Select your USB stick (double-check you don’t have anything important on it, as it will be wiped), pick your custom ISO, and hit start.

A Quick Note on Windows 11 24H2
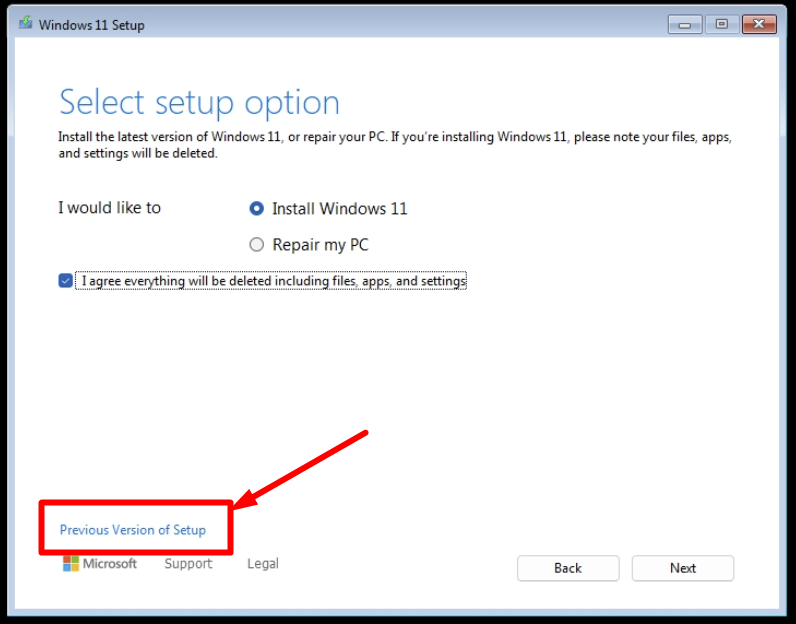
Heads up! When using Windows 11 24H2 as my base ISO, I bumped into the below installation error, which seems to be related to the new Windows setup interface.
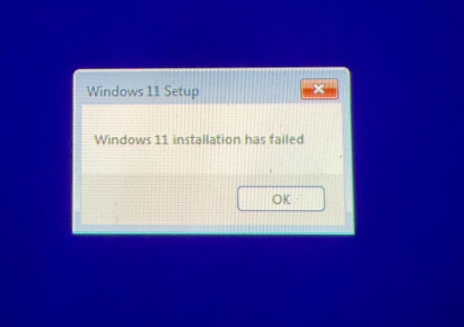
As a workaround, you can either use Windows 11 23H2 as your base ISO or select Previous Version of Setup during the installation wizard.
That’s it! I hope you found this guide helpful. Feel free to reach out if you need any help setting up your custom Windows image. I’m always happy to help!